
A rope hoist looks simple until it becomes the bottleneck on a busy site.
The right choice can make lifts smoother, reduce rework, and keep crews moving without improvising unsafe workarounds.
The wrong choice can turn “just a quick lift” into a daily frustration that adds time, risk, and wear to everything around it.
Why rope hoists earn their spot on real worksites
On construction, renovation, remedial, landscaping, and waste management jobs, most lifting problems aren’t dramatic crane moments—they’re repeated, awkward, time-sensitive movements of materials that don’t justify a major plant.
A rope hoist sits in the middle ground: more controlled than pure manual handling, lighter and quicker to deploy than bigger lifting gear, and useful when access is tight or the work area changes frequently.
They’re often used for tasks like moving equipment into position, lifting sections into a workable height, raising items onto platforms, or managing repeated lifts where “two people and a bit of grunt” stops being sensible.
A rope hoist won’t fix poor planning, but it can remove the daily friction that drains productivity.
Common mistakes that create delays (and risk)
1) Treating load rating as a suggestion rather than a boundary.
Working load limits exist for a reason, and real jobs introduce extra forces—snags, swing, friction points, uneven loads, and sudden starts/stops.
2) Ignoring lift height and travel path until the day of the job.
If the line length, headroom, or landing point is awkward, crews start “making it work” with poor angles, shifting anchors, or repeated resets.
3) Underestimating the duty cycle and lift frequency.
Some sites don’t need a hoist that lifts once an hour—they need one that lifts repeatedly for most of the morning without overheating, glazing components, or forcing downtime.
4) Using whatever anchoring point is nearby.
A convenient beam, scaffold member, or improvised point might be present, but that doesn’t make it suitable.
5) Skipping pre-start checks because the hoist ‘worked yesterday’.
Small issues—wear, contamination, damaged lines, loose fasteners—become big issues when the tool is under load.
6) Not planning for the environment.
Dust, moisture, corrosive air near coastal work, and debris around moving parts change how equipment performs and how often it needs inspection.
7) Confusing “quick setup” with “no setup”.
A rope hoist is fast, not magical; the time saved comes from doing the basics right and not repeating lifts.
Decision factors that matter when choosing a rope hoist
There are plenty of models and configurations, but most good choices come down to a handful of practical checks.
Capacity and real-world load behaviour
Start with what needs lifting, then add realism.
Consider how the load is rigged (balanced vs uneven).
Consider movement during lift (swing, snag points, friction).
Consider whether multiple items will be lifted together “just this once” (it never stays once).
If the load is awkward, not just heavy, build in a margin rather than pushing right to the limit.
Lift height, headroom, and where the load needs to land
A hoist can be perfectly rated and still be wrong for the job if the lift height or travel path is constrained.
Think through:
How high it must lift, not just “off the ground”
How close can you mount to the work area
Where the load will land and how it will be guided into place
A small mismatch here shows up as repeated resets—exactly the kind of slow bleed that kills productivity.
Duty cycle and lift frequency
This is where many “good on paper” choices fail on site.
If the hoist will be used repeatedly—moving bins, lifting materials stage-by-stage, handling equipment across multiple tasks—ask how it handles sustained use and what the recommended rest/inspection rhythm is.
If the work pattern is bursty (short lift sessions with long gaps), you can often prioritise portability and setup speed.
Environment and job conditions
A hoist that lives in a clean workshop behaves differently on a dusty demolition job, a wet remedial project, or a coastal site.
Assess:
Debris risk near moving parts
Moisture exposure and storage between shifts
How easy it is to keep the unit clean and inspected
If the environment is harsh, build your plan around inspection frequency and storage—not just the purchase decision.
Anchoring and attachment reality
This is the make-or-break variable that rarely gets enough attention.
Before selecting equipment, confirm:
Where the hoist will be mounted
Whether the point is suitable for the load and direction of force
Whether the setup allows clear travel without rubbing or side-loading
A strong point in the wrong direction is still the wrong point.
If it helps to sanity-check the basics against real-world configurations, the Conveying & Hoisting Solutions product overview can act as a quick reference point while you confirm ratings and suitability for the site.
Controls, ergonomics, and “crew friendliness”
If one person can operate it smoothly and predictably, it tends to get used properly.
If controls are fiddly, the line is awkward to manage, or the setup encourages odd body positions, the team will avoid it—or worse, work around it.
The best equipment choice is the one that fits how the job is actually performed, not how it’s imagined in planning.
Hire vs buy for Australian SMEs
There’s no universal answer, but there are reliable decision triggers.
Hiring often makes sense when:
The lift is for a short project or a one-off scope
The correct spec changes job to job
Storage and maintenance are a burden between projects
You want to trial a setup before standardising it across crews
Buying often makes sense when:
The hoist is used across many jobs each month
You keep encountering the same lift pattern and constraints
Time lost to inconsistent gear outweighs ownership costs
You have a simple inspection and storage routine that the team will follow
A practical way to decide is to track how often the crew says, “We really need a hoist for this,” and how much time is lost each time the solution is improvised.
Operator Experience Moment
On busy sites, I’ve seen the same pattern: the first lift is slow because everyone’s getting the setup right, and then the pace picks up—until the job changes slightly and the anchoring or travel path no longer suits.
That’s usually when shortcuts appear, not because people don’t care, but because the workflow is under pressure.
The best outcomes come from choosing a setup that still works when the plan shifts by a metre or two.
Simple first-actions plan for the next 7–14 days
Day 1–2: Map the top three recurring lifts.
Write down what gets lifted, how often, where from/to, and what makes it awkward.
Day 3–4: Confirm the anchoring reality.
Identify feasible mounting points and note the direction of force, clearance, and who signs off on the site setup.
Day 5–6: Define your “no-compromise” constraints.
Capacity margin, required lift height, environment issues, and duty cycle expectations.
Day 7–9: Choose the smallest setup that reliably meets the constraints.
Not the biggest, not the cheapest—the one that removes repeats and resets.
Day 10–14: Run a controlled trial and document the routine.
Pre-start checks, setup steps, operator position, and shutdown/storage habits—keep it short enough that crews will actually follow it.
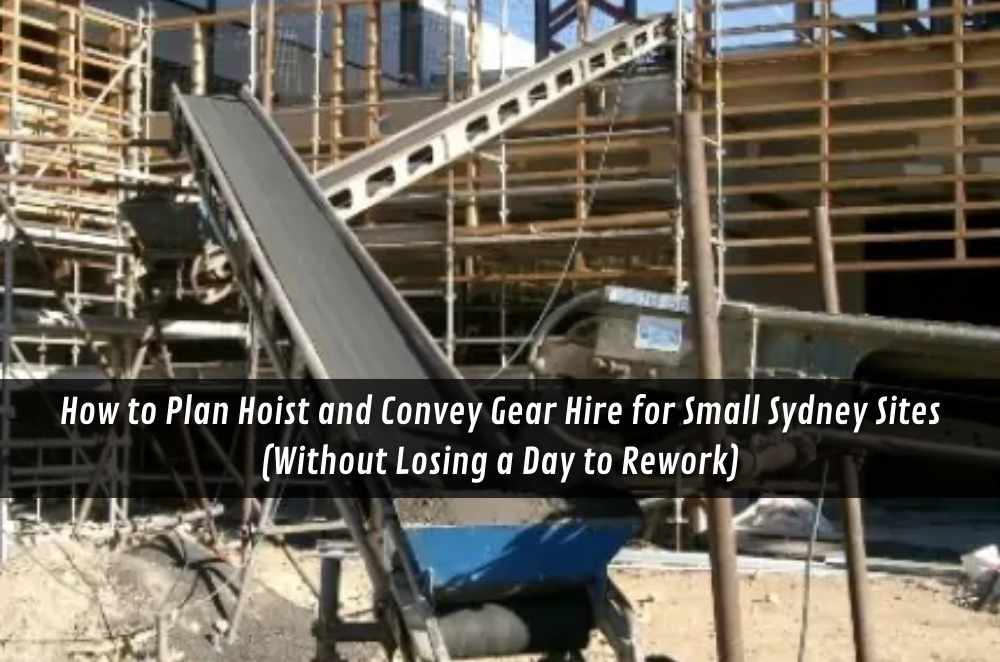
Local SMB mini-walkthrough: Sydney-based team, national delivery reality
A Sydney contractor books a fortnight of remedial work on a mid-rise and realises access is tighter than the drawings suggested.
The crew needs repeated controlled lifts for equipment and materials, so they look at industrial rope lifting equipment for worksites that can be deployed quickly as the work face moves.
They choose a hoist setup based on capacity plus lift height, then confirm a practical anchoring approach for each stage.
They schedule pre-start checks into the morning routine rather than treating them as “extra admin”.
When the job shifts, they adjust mounting and travel path instead of forcing awkward angles.
Because delivery can be arranged across Australia, the same approach can be repeated on the next interstate project without reinventing the process.
Practical Opinions
Prioritise anchoring and travel path clarity before getting excited about specs.
Buy when the workflow is repeatable; hire when the workflow keeps changing.
If the crew won’t use it easily, it won’t get used safely.
Key Takeaways
The “right” rope hoist is the one that fits the lift pattern, environment, and anchoring reality—not just the load.
Most problems come from lift height/path, duty cycle mismatch, and improvised attachment points.
A short 7–14 day plan beats a rushed purchase decision made mid-project.
Crew-friendly setup and simple checks are what keep productivity gains real.
Common questions we hear from Australian businesses
How do we know if a rope hoist is the right tool versus another lifting option?
Usually, the giveaway is repetition: if the team keeps doing the same awkward lift and it’s slowing work down, a hoist becomes worth assessing.
Next step: list the top three recurring lifts and note weight, lift height, and where the load needs to land.
In Australia, also factor in how quickly site conditions change—tight access and shifting work faces make portability and setup speed more valuable.
What should we document so that different crew members can use the hoist consistently?
In most cases, a one-page routine beats a thick manual that nobody reads.
Next step: Document the setup sequence, the approved anchoring points, a short pre-start checklist, and how the load is guided during landing.
On Aussie worksites, keep it practical and aligned with normal pre-start habits so it fits toolbox talk culture rather than competing with it.
Is it better to hire first before buying?
It depends on how predictable the job pattern is across projects.
Next step: trial a hire unit on a real lift scenario and capture what worked and what caused resets (anchoring, line management, clearance, or duty cycle).
For Australian SMEs running jobs across metro and regional areas, hiring first can reduce the risk of buying gear that suits one site type but not the next.
How often should we inspect and maintain a rope hoist?
Usually inspection frequency increases with harsh conditions and high use, not just calendar time.
Next step: build a simple schedule: quick pre-start checks daily, more thorough checks at set intervals, and immediate inspection after any unusual event (snag, shock, contamination).
In many Australian environments—dusty demo work, wet remedial jobs, coastal exposure—storage and cleaning between shifts are just as important as the checks themselves.


Write a comment ...